
Invite colleagues to join your organisation in Simana. You can add several recipients to one invitation and choose any additional memberships, follows and message before sending it.
To understand how Team membership determines access after someone joins, see How Teams and permissions work in Simana.
Before you start
- You need Admin access to your organisation.
- Have the email addresses of the people you want to invite ready.
- Decide whether they should join any additional spaces, groups or cards.
1. Open the invitation panel
- Open the navigation menu using the Simana logo, if it is not already open.
- Under Settings, select your organisation's name.
- In Manage organisation, select the cog beside Team.
- Select Invite users.
An invitation panel opens. Your organisation's name appears in the Add to [organisation name] option. The examples below use Bayhealth General Hospital.
Note: Opening Invite users creates an invitation entry in Invite history. Preparing an invitation does not send it; sending is a separate step.
2. Add the people you want to invite
- Select Add to [organisation name].
- Enter the person's email address in the new recipient row.
- Repeat these steps for each additional person.
- Check each email address and the name displayed beneath it.
Simana interprets the recipient's name from their email address. To correct it, select the cog beside the recipient, turn off Interpret name, and enter their First name and Last name.
To remove a recipient before sending, select the bin beside their row.
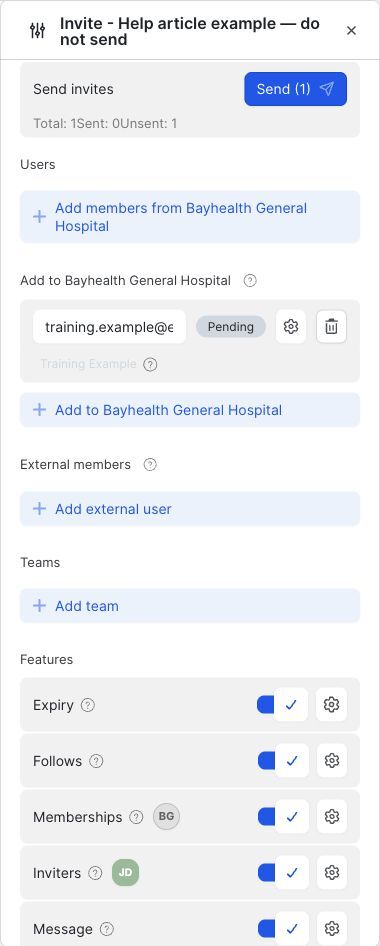
Important: Check the email addresses before sending. A name interpreted from an email address may need correcting.
3. Review memberships and optional settings
Under Features, use the switches to enable the options you need and the cogs to configure them.
| Option | What to configure |
|---|---|
| Memberships | Review the organisation membership and optionally add spaces, groups, cards or templates. The invitation created from Bayhealth's organisation Team already includes Bayhealth General Hospital. |
| Follows | Optionally select groups, cards or templates for recipients to follow. Review this separately from their memberships. |
| Inviters | Choose who is shown as inviting the recipients. The current user is included as the default. |
| Message | Enable this option to edit the invitation message. When it is disabled, Simana still sends its standard invitation message ("You're invited to contribute."). |
| Expiry | Enable this option and select an Expires on date. After the date you specify the recipients appear as expired in invite history. |
For Memberships, select the cog and check that the intended organisation appears under Organisations. Add any other memberships required for these recipients, then close the configuration panel to return to the invitation.
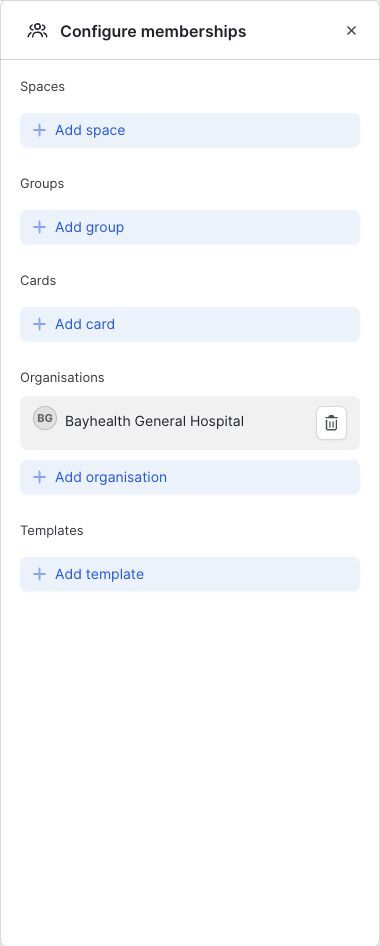
Important: Memberships and follows are separate settings. Review both; selecting something to follow should not be treated as a substitute for configuring membership and access.
Joining a Team gives a member the permissions configured for that membership. Access can also come from organisation-member settings or an inherited membership. See Change a member’s permissions for guidance on permission levels and inheritance.
Expiry note: The expiry settings initially show a date 30 days ahead. Each recipient invited while Expiry is enabled receives the selected date. Changing it later does not alter invitations already sent.
4. Name and check the invitation
- Under Details, enter a useful Invite name, such as “October improvement team onboarding”.
- Review all recipients, memberships and optional settings.
- At the top of the panel, check the Sent and Unsent counts and the number beside Send.
The invitation name helps you identify the entry later.
5. Send the invitation
When you are ready, select Send at the top of the panel.
Review the invitation later
Return to your organisation's Team panel and expand Invite history. Select the cog beside the relevant invitation to open its configuration and review its recipients and counts.